How To Use Middleware In Laravel
Hello Friends,
Today, Our topic is Laravel Middleware. Today, We will learn that. How we can create a middleware and how we can use middleware. We will create a custom laravel middleware.
I am creating this tutorial with laravel 9. But It will work on all the significant versions of laravel. We will create an IsActiveMiddleware. Which will be used to check if the user is active or not before accessing any web pages.
Let's understand the Laravel Middleware with an example.
What is middleware?
Laravel Middleware is used to filter HTTP requests in your web application. One of the basic requirements of any web application is an HTTP requests filter. There are many default middleware are available in the laravel like Auth and Sessions. so we have to make one as well for example make auth middleware. auth middleware always checks if you are going then and then you can access those pages.
Install Laravel
Our very first step is to install a laravel application. So, We can start the laravel app for our middleware example. To Install laravel run the below command in your command prompt or terminal. I am installing laravel using the composer. you can select your own method.
composer create-project laravel/laravel middleware-example
After installing the laravel, We need to set up the laravel auth because our Middleware is related to user auth.
Create Auth Scaffolding
Now, We need to create Auth Scaffolding, So users can access the auth URLs. Let's install the laravel UI package and generate auth scaffolding.
Install the Laravel UI Package with the following command.
composer require laravel/ui
Here, we need to generate auth scaffolding in laravel 9 using the laravel UI command. so, let's generate it by the below command:
php artisan ui bootstrap --auth
After these steps, We also need to run the NPM commands to compile the js and CSS files, Otherwise login and register look as broken.
Install NPM
npm install
Run NPM
npm run dev
Create Middleware
In this step, We will create a middleware file. for this, Open the command prompt or terminal and run the below command.
php artisan make:middleware IsActiveMiddleware
This command will create an IsActiveMiddleware.php file.
Change the file below.
<?php
namespace App\Http\Middleware;
use Closure;
use Illuminate\Http\Request;
class IsActiveMiddleware
{
/**
* Handle an incoming request.
*
* @param \Illuminate\Http\Request $request
* @param \Closure(\Illuminate\Http\Request): (\Illuminate\Http\Response|\Illuminate\Http\RedirectResponse) $next
* @return \Illuminate\Http\Response|\Illuminate\Http\RedirectResponse
*/
public function handle(Request $request, Closure $next)
{
if (!auth()->user()->is_active) {
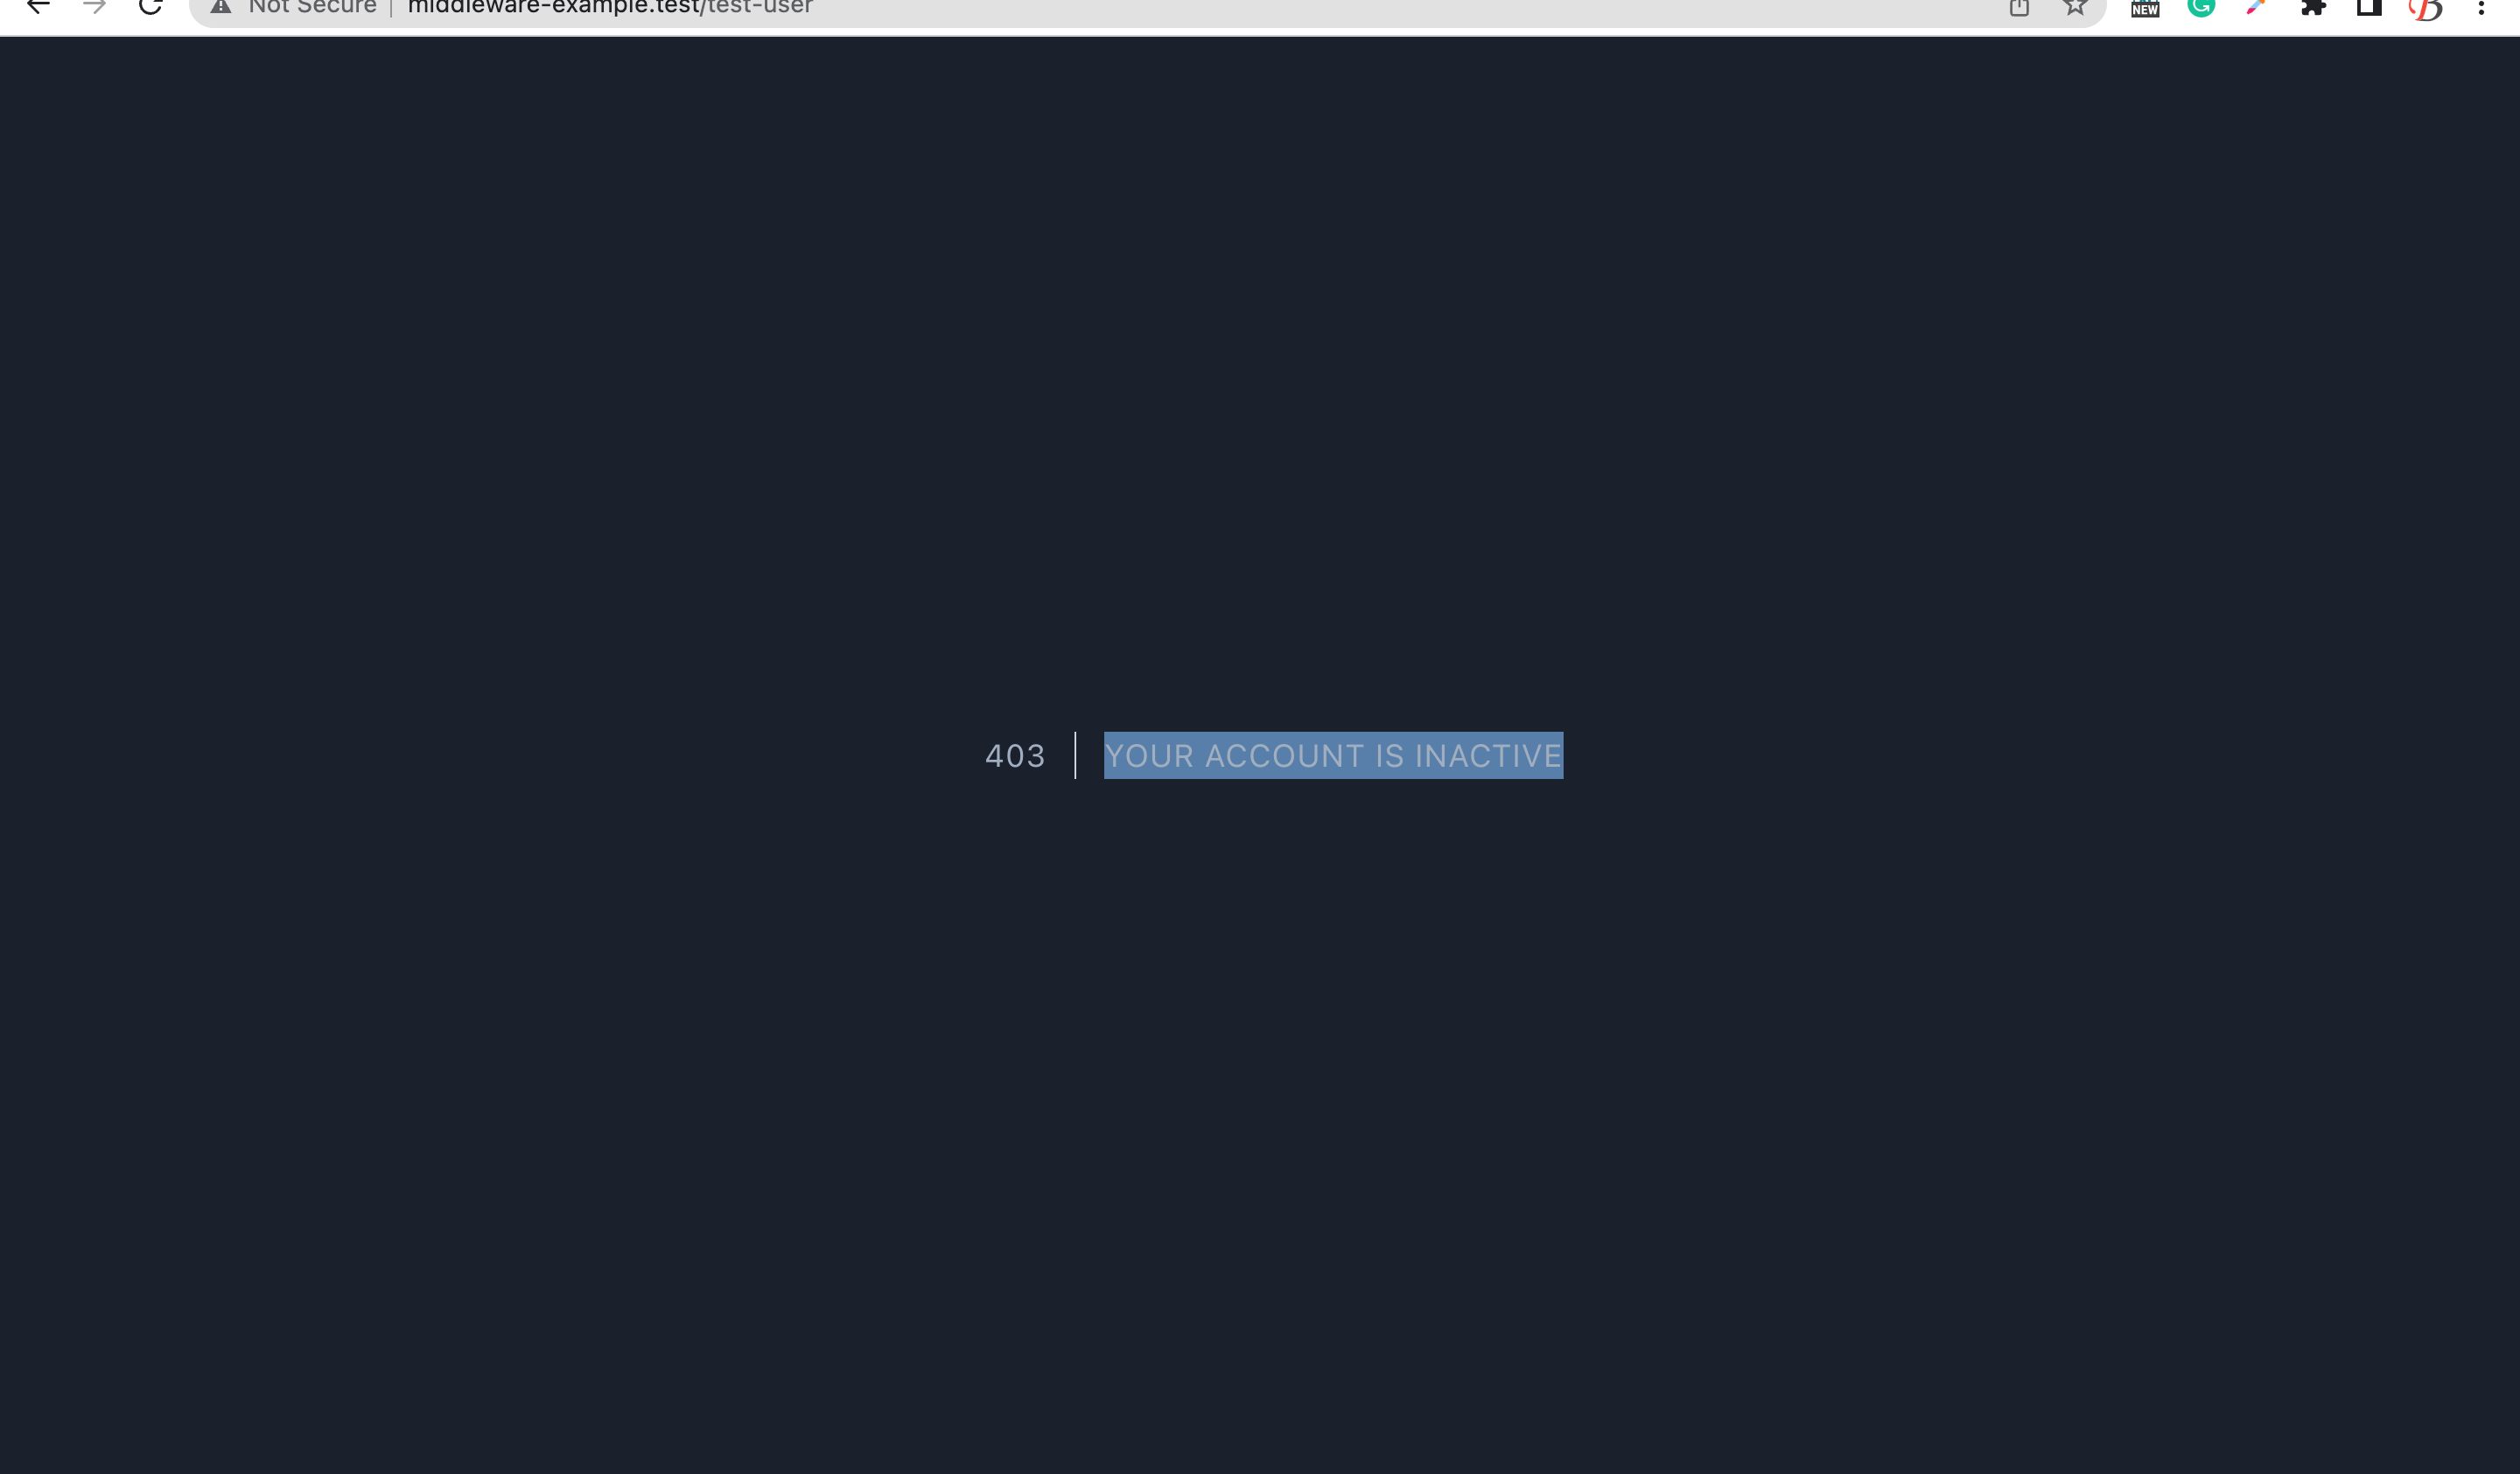
return abort(403,'Your account is inactive');
}
return $next($request);
}
}
Register Middleware
After making the changes, We need to register the middleware file in the kernel.php file.
app/Http/Kernel.php
<?php

namespace App\Http;

use Illuminate\Foundation\Http\Kernel as HttpKernel;

class Kernel extends HttpKernel
{
    ....

    /**
     * The application's route middleware.
     *
     * These middleware may be assigned to groups or used individually.
     *
     * @var array
     */
    protected $routeMiddleware = [
        ....
        'is-active' => \App\Http\Middleware\IsActiveMiddleware::class,
    ];
}
Now, Our middleware is registered. Our middleware will be identified as 'is-active'.
Use Middleware
After creating and registering the middleware. We can use the middleware. We will use our middleware in the routes. Open web.php file and change as below.
routes/web.php
<?php

use Illuminate\Support\Facades\Route;

use App\Http\Controllers\HomeController;

/*
|--------------------------------------------------------------------------
| Web Routes
|--------------------------------------------------------------------------
|
| Here is where you can register web routes for your application. These
| routes are loaded by the RouteServiceProvider within a group which
| contains the "web" middleware group. Now create something great!
|
*/

Route::get('/test-user', [App\Http\Controllers\HomeController::class, 'index'])->middleware(['auth', 'is-active']);
Add is_active Column in users table
We need to add the is_active column in the user table. Which will be used to identify whether the user is active or not in the middleware. We need to create the migration file to add the column. Run the following command in the terminal or command prompt.
php artisan make:migration add_is_active_column
This command will create a migration file and change the file as below.
<?php

use Illuminate\Database\Migrations\Migration;
use Illuminate\Database\Schema\Blueprint;
use Illuminate\Support\Facades\Schema;

return new class extends Migration
{
    /**
     * Run the migrations.
     *
     * @return void
     */
    public function up()
    {
        Schema::table('users', function (Blueprint $table) {
            $table->boolean('is_active')->default(0);
        });
    }

    /**
     * Reverse the migrations.
     *
     * @return void
     */
    public function down()
    {
        Schema::table('users', function (Blueprint $table) {
            $table->dropColumn('is_active');
        });
    }
};
Next, We need to run the migration command to create the table in the database.
php artisan migrate
This command will create the table in the database.
Create or Update UserFactory
Let's update the factory file to create the fake records in the users table. Change the file as below.
<?php

namespace Database\Factories;

use Illuminate\Database\Eloquent\Factories\Factory;
use Illuminate\Support\Str;
use Illuminate\Support\Facades\Hash;

/**
 * @extends \Illuminate\Database\Eloquent\Factories\Factory<\App\Models\User>
 */
class UserFactory extends Factory
{
    /**
     * Define the model's default state.
     *
     * @return array<string, mixed>
     */
    public function definition()
    {
        return [
            'name' => fake()->name(),
            'email' => fake()->unique()->safeEmail(),
            'email_verified_at' => now(),
            'password' => Hash::make("password"), // password
            'remember_token' => Str::random(10),
            'is_active' => rand(0,1)
        ];
    }

    /**
     * Indicate that the model's email address should be unverified.
     *
     * @return static
     */
    public function unverified()
    {
        return $this->state(fn (array $attributes) => [
            'email_verified_at' => null,
        ]);
    }
}
Update Seeder file
<?php

namespace Database\Seeders;

// use Illuminate\Database\Console\Seeds\WithoutModelEvents;
use Illuminate\Database\Seeder;

class DatabaseSeeder extends Seeder
{
    /**
     * Seed the application's database.
     *
     * @return void
     */
    public function run()
    {
        \App\Models\User::factory(10)->create();

        // \App\Models\User::factory()->create([
        //     'name' => 'Test User',
        //     'email' => 'test@example.com',
        // ]);
    }
}
Run the App
All steps are complete now. Let's run the app by running the following command.
php artisan serve
Now, Go to your web browser, type the given URL and view the app output:
http://localhost:8000/login
Now, You can try using login with any user. It will redirect to 403 page if the user is inactive.
In Active user OUTPUT
I hope this tutorial is helpful for you.
Please share this tutorial with your team and friends.
Thank You.

Templatebench
We are Template bench. We love programming. We also love to share tips and tricks with you.